BOUDREAUX’S COLLISION · REPAIR EDUCATION
Collision Repair Process: From Accident to Delivery
A collision repair can move through safe transport, intake, assessment, teardown, repair planning, parts, body or structural work, refinishing and verification. The sequence depends on the vehicle and findings, and some stages overlap.
From the Boudreaux’s repair archive
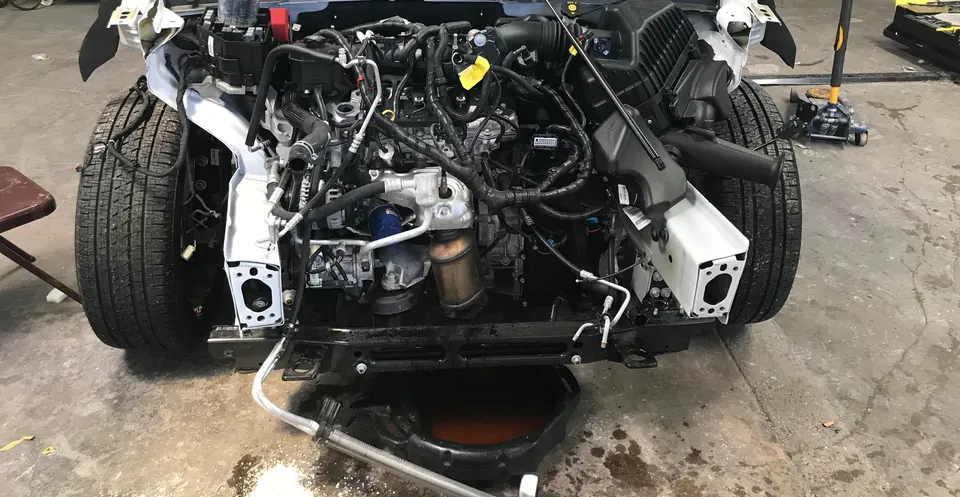
Owner-supplied GMC project archive: opened front assembly during workshop work. Source metadata is dated June 2017. This detail view illustrates a repair stage; it does not establish the full method, completed checks or repair duration.
What are the main stages of collision repair?
A collision repair can move through safe transport, intake, assessment, teardown, repair planning, parts, body or structural work, refinishing and verification. The sequence depends on the vehicle and findings, and some stages overlap.
A complete plan connects the inspected damage with the required procedures and operations. Paint is one stage, not the end of every check. Ask what has been confirmed, which approvals or parts are outstanding and how the final inspection is documented. Use the stage-by-stage guide below to understand why a repair develops beyond the first estimate.
Ask for the current milestone and its dependency
Use three questions for an update: What stage is complete? What is preventing the next operation? When will that item be reviewed again? A specific answer may identify an inspection question, authorization, part configuration or separate service arrangement.
Keep the estimate date with the update. If a new finding changes the sequence, ask which work is added and which later milestone depends on it. This makes progress clearer than treating every parked vehicle as being at the same stage.
1. Safe Transport and Intake
A vehicle’s ability to start does not establish that it is safe to drive after an impact. Resolve immediate hazards first, then confirm the shop destination and any transport arrangement. At intake, provide vehicle information, keys, contact preferences and available claim documents. Explain new warnings or symptoms and distinguish them from issues that were already present. The team needs that history to understand the starting condition. Ask whether this stage authorizes inspection only, teardown or another specific operation; arrival is not a final scope or a confirmed completion date.
2. Inspection and Access
Inspection starts with visible findings and identifies areas that need closer evaluation. Some conditions are hidden by installed parts. Controlled teardown can provide access, but the required extent depends on the vehicle and damage rather than a universal disassembly rule. Ask which areas remain unconfirmed before access and how new findings are documented. Photos are useful evidence of visible conditions, but they do not establish every mounting point, material condition or electronic concern. The assessment should develop with the evidence instead of assuming hidden damage exists or assuming it cannot exist.
3. Repair Information and the Detailed Plan
The detailed plan connects findings with the vehicle’s materials, permitted methods and required operations. Repair information can control sectioning, replacement, attachments, one-time-use parts, corrosion protection and electronic setup. Correct identification of the vehicle and installed systems matters. Ask which procedure supports an operation and which related steps belong with it. This is why two similar-looking impacts can need different plans. An estimate records items and costs at a stage of the process; a technical plan explains how the actual vehicle will be addressed.
4. Documentation, Authorization and Parts
Additional findings can require supplemental documentation and further approval discussions. Keep the repair requirement, authorization to proceed and insurance payment distinct. Ask what is outstanding and who must respond. Correct parts availability can also influence the sequence: a small attachment or bracket may hold up work even when a larger panel has arrived. Parts source and compatibility need to be identified alongside installation requirements. An early target date can change if the scope, parts or unresolved decisions change, so ask for the next specific update rather than treating the first date as a guarantee.
5. Body or Structural Work
The repair method depends on the affected components, materials and allowed procedures. A removable outer panel and a joined structural reinforcement are different jobs. Where required, measuring supports the structural assessment and later checks. Attachment methods and protection disturbed during the work need attention along with the visible shape. Ask which parts are repaired or replaced and which measurements or inspections support that decision. This stage does not mean every vehicle requires pulling, sectioning or structural replacement; the documented damage and procedure establish the operations.
6. Refinishing and Reassembly
Refinishing can involve preparation, undercoats, color evaluation, blending and the appropriate finish boundary. A factory paint code is a starting point rather than the entire matching process. Reassembly reconnects and reinstalls parts and systems disturbed by the work. Fit, seals, attachments and affected functions may need checks. Ask what the plan includes beyond applying color and installing the outer parts. Photos of a completed exterior can show appearance, but they do not independently document every attachment, concealed protective layer or system requirement.
7. Required Setup, Verification and Delivery
Scanning, diagnostic checks, alignment and calibration address different questions and may have a specified sequence. The exact vehicle and operation determine which tasks apply. Ask what was checked, which reports are retained and whether any limitation or unrelated condition remains. A clear scan alone does not certify every physical repair, and a routine test drive does not replace a prescribed calibration procedure. At delivery, review the work and available documentation with the shop, ask about finish care and identify the appropriate contact for later questions. Do not infer an unconfirmed warranty or universal repair outcome.
Related Repair Guidance
Questions About Collision Repair Process: From Accident to Delivery
More Answers in This Repair Topic
Track the current stage instead of asking only for a finish date
A more useful progress question identifies where the vehicle is now: assessment, repair planning, approvals, parts, repair operations or verification. Ask which step is complete and what is needed for the next one. A vehicle can be at the shop without every finding, part or authorization being settled, so arrival should not be confused with the start of all repair work.
Keep the current estimate and approved changes accessible. If a new finding appears, ask how it changes the plan and who must approve the next step. If parts affect progress, ask whether the issue is availability, the correct configuration or another unresolved requirement. Clear questions help the team provide a meaningful update while avoiding a promise that cannot yet be supported.
At delivery, use the repair records to discuss the completed scope and relevant checks. Ask about care instructions for refinished areas and how to report a concern. The end of the repair conversation should leave you with a clear understanding of the work and follow-up route, not simply a recollection of the initial estimate number.